Connecting for Kids on Facebook Connecting for Kids on Instagram Connecting for Kids on Twitter
  • Home |
  • Join us |
  • Get Involved |
  • Donate
Log in
Log in with Facebook Log in with Google
Forgot password
Connecting for Kids logo: You're not alone.


  • Home
  • Register
    • Adult Programs
      • Behavior Chat
      • Speaker Series
      • Support Programs
      • Online Support
      • Parent Match
    • Programs with My Child
      • Family Outings
      • Music Therapy & More
      • Teach Me to Play
      • Consults
    • En Español
    • Resource Fairs
      • Eastern Cuyahoga Resource Fair
        • 2023 Participants
      • Lorain County Resource Fair
        • 2023 Participants
      • Western Cuyahoga Resource Fair
        • 2023 Participants
      • Resource Fair Tips
        • Camp Questions
        • Therapist Questions
        • Social Skills Group Questions
      • Vendor Information
    • Fundraising Events
    • Adapted Library Programs
    • Health and Safety
  • Resources
    • Service Provider Directory
    • Family Education Topics
    • Resource Guides
    • How-To Guides
    • Parks & Playgrounds
  • Awareness
    • Parking Lot Safety
    • Sensory
    • Wandering
  • About
    • Get Involved
      • Join
      • Volunteer
        • Join Our Board
      • Donate
      • Careers
    • Contact Us
    • Monthly Connect
    • Board of Directors
    • Staff
    • Your Privacy
      • Website
      • Photography/Recording
    • Translation

Home   »   Resources  »  How-to Guides

Creating A Visual Schedule for your Child

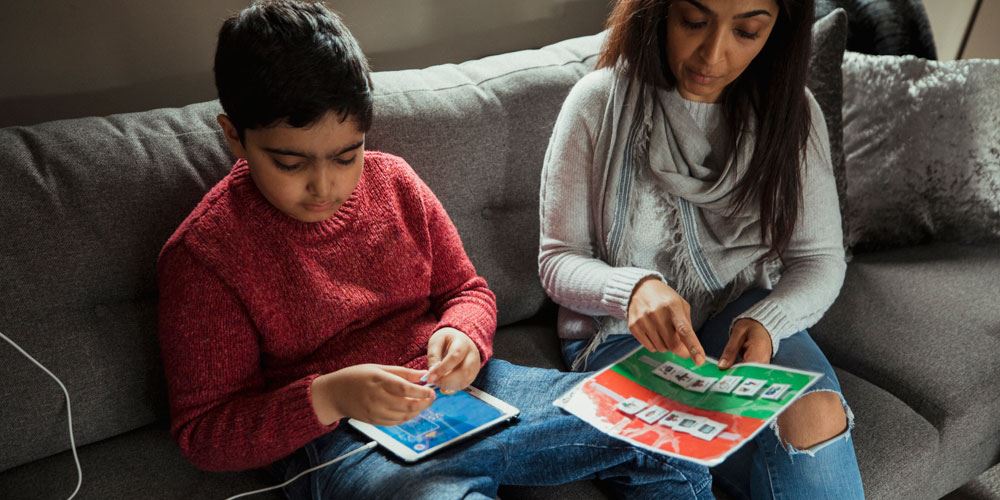
People feel more comfortable when they know what to expect. The rule same applies to children. When you use a visual schedule for your child, you can help them:

  • Know what's going to happen next
  • Improve language skills
  • Be more independent
  • Learn first, next, then (sequencing)

Step 1: Choose Activities

Before you begin, think about the activities you want to include. Will your schedule cover the whole day? Just parts where your child has trouble?

Think about these questions and more as you complete step 1.

Step 2: Create a Schedule

When making your schedule, think about how your child gets information. Do they understand pictures? Words?

Also think about the materials you have available. There are lots of ideas online!

Consider these questions and more as you complete step 2.

Step 3: Try and Revise

Schedules are a great tool, but sometimes you will need to make changes.

As you get better at using a visual schedule, you will be able to make changes that help your child. Learn more in step 3.

Ask Us logoOur Family Resource Specialists can help you with this process. Contact us to learn more.


Step 1: Choose Activities

It's tempting to put everything on you schedule, but children can get overwhelmed with long lists. You'll have more success if you focus on your child's needs. To help you decide, think about these questions:

  • When does your child need support/reminders? Morning routine? Getting school work done? Doing a specific job? Getting ready to go out?
  • What activities are easy for your child?
  • Does your child need more help for some tasks? For example, fine motor skills, gathering materials, staying on task, etc.
  • What tasks can your child do without your help?
  • How old is your child?
  • What do you need to get done?


Tip: Don't Forget Breaks!

When choosing activities, remember to include breaks. Breaks can include:

  • Rewards
  • Sensory activities
  • Motor play
  • Free choice times
  • Snacks

It's a good idea to add a break after difficult tasks.


Step 2: Create a Schedule

There are lots of ways to make visual schedules. Schedules can be made with:

  • Laminated or plain paper
  • Recycled cardboard
  • Magnets
  • Clip boards
  • A baking sheet
  • Hook and loop tape (like Velcro)
  • Re-usable adhesive putty (like Plasti-tak)
  • Real objects (for example, a section of cracker box for snack time)

When choosing materials, think about whether you will take the schedule with you or  use it at home. You should also think about size (for example, 2x2 inch icons are about the right size for a toddler or preschooler).

Next, think about the tasks on the schedule.

  • What will your child understand? Do you need to use real objects? Can you use photos? Does your child understand symbols or drawings?
  • Can you include words? Even if your child doesn't read yet, using words can help build early reading skills.
  • How specific do you need to be? For example, "table time" could stand for sensory table play, arts and crafts, a science activity, puzzles, writing, or other fine motor activity.

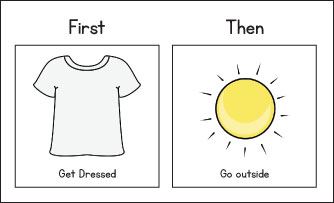
If possible, ask your child to help choose the icons. This can help them feel ownership of their schedule.

The final step is to make your schedule. Remember to make tasks durable and removable. Once your child has finished a task, they should remove it and put it in an "all done" pocket.

Tip: Getting Started

When starting out, it's best to use a simple schedule. Start with two symbols (first/then). For example, first get dressed, then go outside.


After your child understands first/then, you can add more steps.

Tip: Create Different Schedules for Different Activities

Rather than trying to fit a whole day into one schedule, create different schedules for different times of the day. For example, make a "morning routine" schedule and a "get ready for bed" schedule to use at different times of the day.


Step 3: Try and Revise

Try to be a responsive and reflective decision maker. If you see that your child is getting upset during a task, RESPOND. Maybe it's time to start that sensory break a little early and finish the task later in the day.

REFLECT at the end of the day. What worked? What didn't? Do you need to change the order of tasks? Build in more rewards or breaks?

Remember

Schedules are a great tool, but it's also important to be flexible. If you need to change your child's schedule, label that. For example, "I know your schedule says we are going to the store next, but we need to make a change. First we'll go to the post office and then we'll go to the store."

  • About Us |
  • Board of Directors |
  • Staff |
  • Privacy |
  • Contact Us |
  • Donate |
  • Join Us
Parker logo
Website supported by a grant from Parker.

Call, text or email:

Phone: 1-440-570-5908
Email: info@connectingforkids.org

Post Office Box:

30628 Detroit Rd. #252
Westlake, Ohio 44145

Copyright 2015-2022, Connecting for Kids of Westlake

Powered by Wild Apricot Membership Software